
Introduction to Apple Crisp
Apple crisp is the quintessential fall dessert. As the leaves begin to turn and the air gets that crisp chill, there’s something utterly comforting about a warm dish of baked apples topped with a golden, buttery oat crumble. This beloved treat is not only a fantastic way to showcase seasonal apples, but it also brings a cozy, homemade feel to your table.
Why Apple Crisp is the Perfect Fall Dessert
Imagine gathering with friends or family on a cool autumn evening, the aroma of cinnamon and caramelized apples wafting through the air. Apple crisp invites everyone to share in this experience. It’s easy to make, requiring just a few simple ingredients typically found in your pantry. It’s also versatile—try pairing it with a scoop of vanilla ice cream or a drizzle of caramel sauce for an indulgent twist.
Moreover, the benefits of fresh apples are plentiful. According to the USDA, apples are high in dietary fiber and vitamin C, making your dessert feel a little healthier while still satisfying your sweet tooth. So, whether you're in a bustling city or a quiet countryside, apple crisp is guaranteed to warm your hearts this season. Ready to dive in? Let’s explore this delightful recipe together!
Ingredients for Apple Crisp
Essential ingredients for the best apple crisp
When it comes to making a classic Apple Crisp, having the right ingredients is crucial for achieving that perfect blend of flavors and textures. Here’s what you’ll need:
- 10 cups all-purpose apples: Go for a mix of tart and sweet varieties like Granny Smith and Honeycrisp for depth of flavor.
- 1 cup white sugar: Helps to sweeten the apples and create a delightful syrup.
- 1 tablespoon all-purpose flour: This thickens the apple mixture.
- 1 teaspoon ground cinnamon: Essential for that warm, comforting flavor.
- 3 tablespoons water: Adds moisture to the filling.
- 1 cup quick-cooking oats: For the crunchy topping.
- 1 cup all-purpose flour: Forms the base for the crisp topping.
- 1 cup packed brown sugar: Adds sweetness and a hint of molasses flavor.
- ¼ teaspoon baking powder & baking soda: Contributes to the texture.
- ½ cup butter, melted: Brings everything together.
Optional ingredients for personalization
Don't hesitate to get creative! Here are some optional ingredients that can elevate your Apple Crisp:
- Nuts (like walnuts or pecans): For added crunch and healthy fats.
- Dried fruits (like raisins or cranberries): Adds great texture and sweetness.
- Vanilla extract: A splash can enhance the overall flavor profile.
- A pinch of nutmeg: Pairs beautifully with cinnamon.
Feel free to mix and match to create your own signature version! For more tips on enhancing your desserts, check out Baking Tips from Food Network.
Preparing Apple Crisp
Making a delicious Apple Crisp is not just about baking; it's an experience that fills your home with the warm scent of cinnamon and sweet apples. Follow these simple steps to create a dessert that's sure to impress your friends and loved ones!
Gather Your Ingredients
Before diving into the fun part of cooking, it's essential to gather all your ingredients. You'll need:
- 10 cups all-purpose apples (peeled, cored, and sliced)
- 1 cup white sugar
- 1 tablespoon all-purpose flour
- 1 teaspoon ground cinnamon
- 3 tablespoons water
- 1 cup quick-cooking oats
- 1 cup all-purpose flour for the topping
- 1 cup packed brown sugar
- ¼ teaspoon baking powder
- ¼ teaspoon baking soda
- ½ cup melted butter
Getting everything ready at once can make the process smoother and more enjoyable—plus, you won't have to scramble around your kitchen in the middle of mixing.
Prepping the Apples
Choose your favorite apples for the Apple Crisp. Tart varieties like Granny Smith or a sweet combo like Honeycrisp work beautifully. Once you’ve peeled, cored, and sliced the apples, it's time to mix them with some flavor! In a large bowl, combine the apple slices with white sugar, flour, cinnamon, and water. This combination creates a delightful syrup that will bubble beautifully as it bakes.
Making the Apple Mixture
Transfer the apple mixture into a greased 9x13-inch baking dish. Make sure to evenly distribute the apples so every bite is just as delicious! Sprinkling the flour and sugar mix will help ensure that the apples are beautifully coated and flavorful throughout.
Preparing the Oat Topping
Now, let's create that crunchy topping that complements the tender apples. In a large bowl, mix the oats, flour, brown sugar, baking powder, and baking soda. Pour in your melted butter and use a fork to combine until it's crumbly. You want a texture that will crisp up nicely in the oven. This topping is really the crowning glory of your Apple Crisp.
Assembling and Baking the Crispy Dessert
Once everything is prepped, it’s time for assembly! Take your prepared apple mixture and evenly sprinkle the oat topping over it. Preheat your oven to 350 degrees F (175 degrees C) and pop it in for about 45 minutes. You’ll know it’s done when the apple filling is bubbling, and the topping is golden brown and crispy.
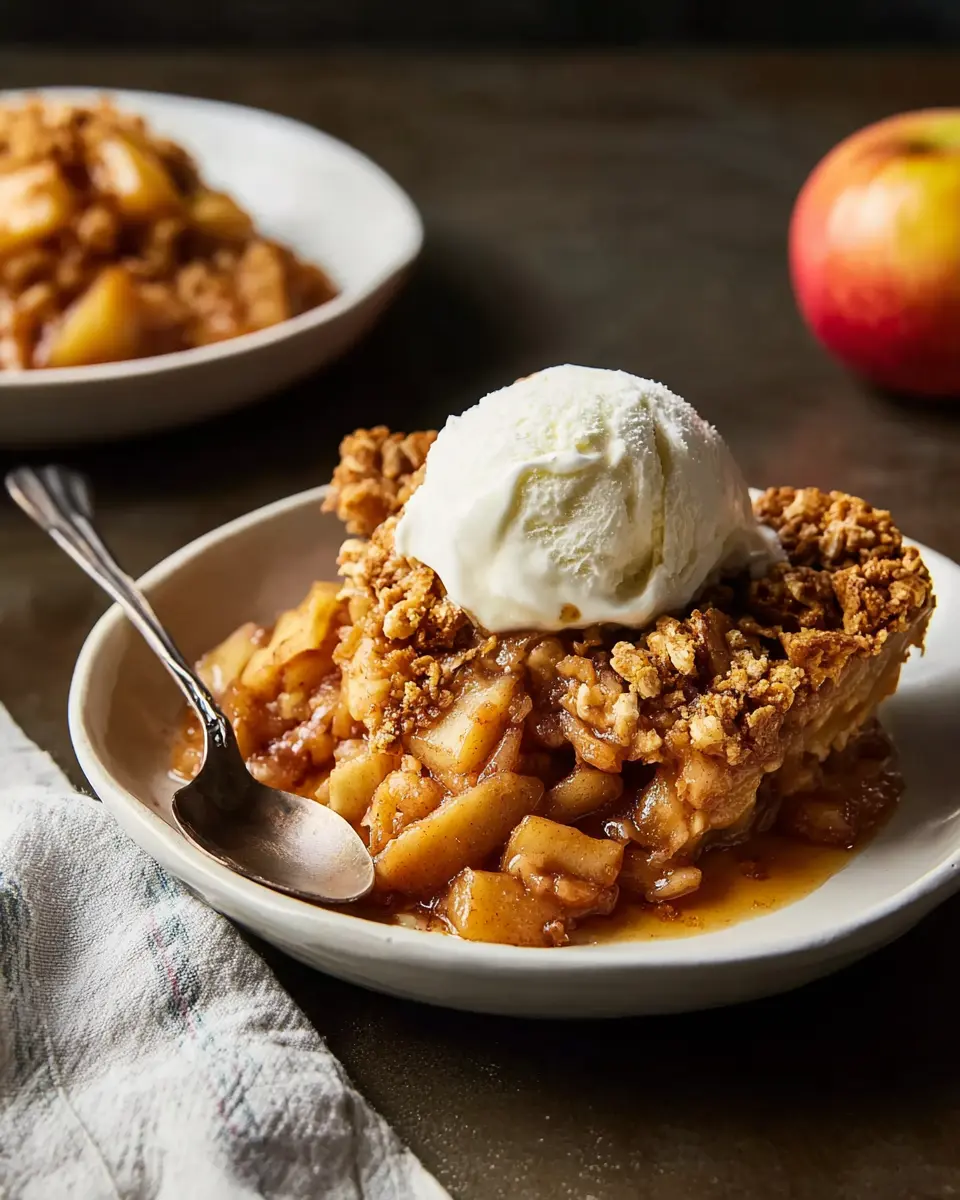
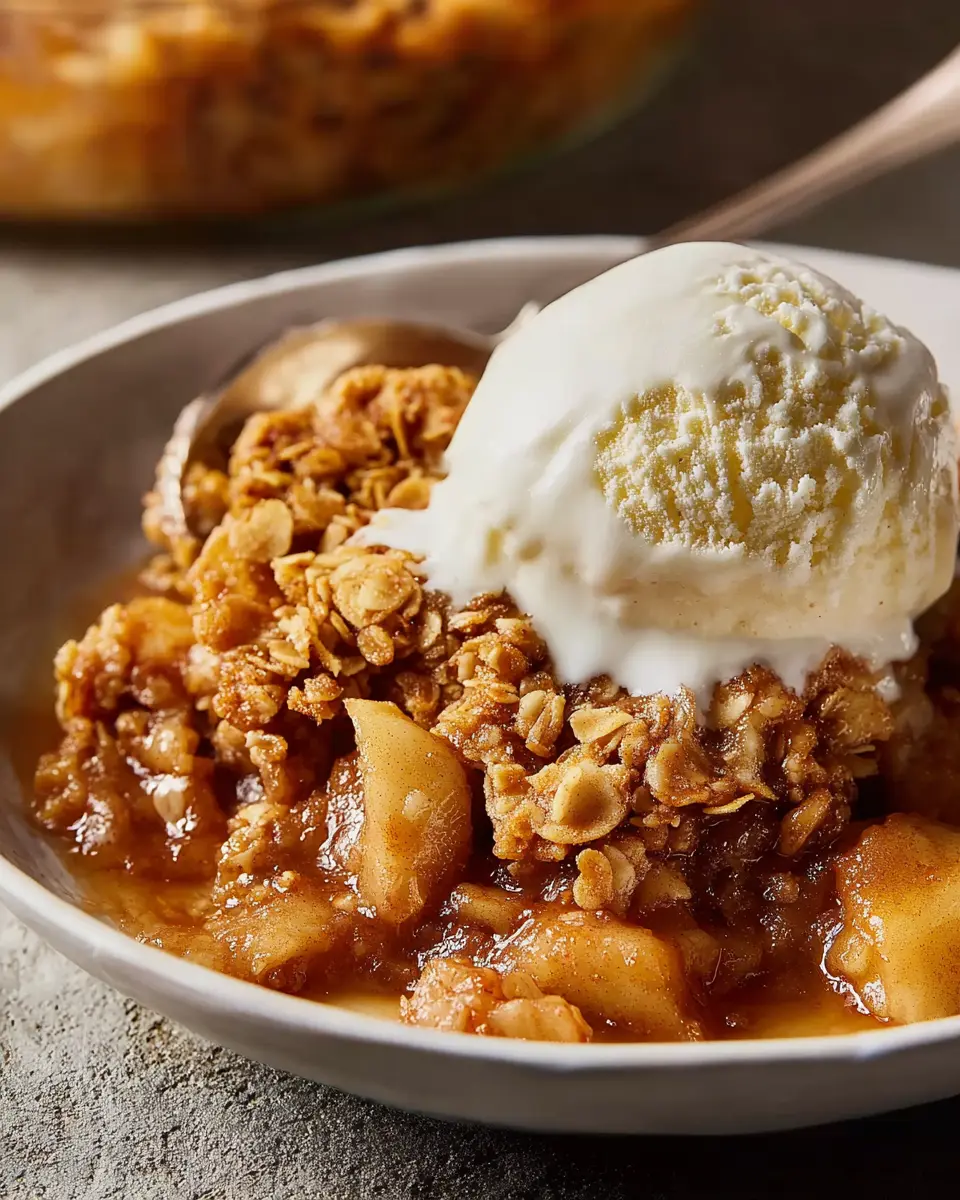
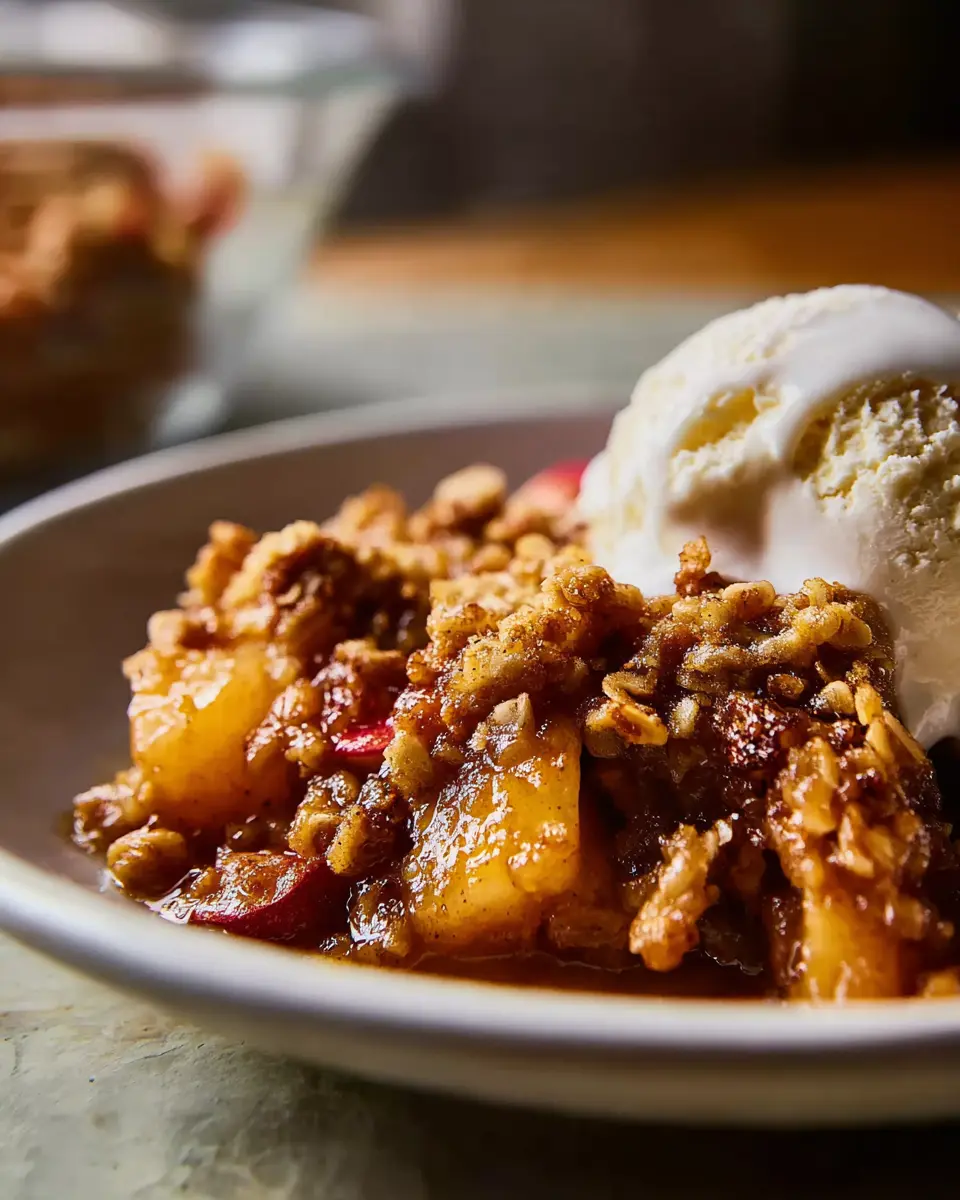
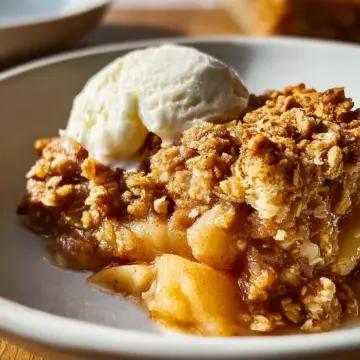
Once it's out of the oven, let it cool slightly before serving. This Apple Crisp is fantastic on its own or served warm with a scoop of vanilla ice cream for that extra indulgence!
Enjoy this nostalgic treat and share the recipe with friends—it’s a classic that everyone loves! For more apple-inspired dishes, consider exploring Bon Appétit’s guide to apples for more inspiration!
Variations on Apple Crisp
Gluten-free Apple Crisp
If you're looking to enjoy apple crisp without the gluten, you're in luck! Simply swap out regular flour for a gluten-free blend or almond flour. Use certified gluten-free oats to ensure everything stays safe and delicious. You won’t sacrifice flavor—this version will still deliver that delightful crunch on top of tender apples. For additional flavor, consider adding a pinch of nutmeg or using honey instead of sugar.
Nutty Apple Crisp
Add a delightful crunch with a nutty twist! Incorporate your favorite nuts, such as walnuts, almonds, or pecans, into the topping for a satisfying texture. Simply chop them coarsely and mix them with your oat topping. This variation not only enhances the flavor but also provides a nice boost of healthy fats. Pair your nutty apple crisp with some caramel drizzle to take it to the next level of sweetness!
For more variations, explore Healthy Apple Crisp Recipes or check out tips on Creative Topping Ideas for your next baking adventure!
Cooking Tips and Notes for Apple Crisp
Choosing the Best Apples for Crispiness
Selecting the right apples is crucial to achieving that delightful crispiness in your Apple Crisp. Opt for a mix of tart and sweet varieties. Granny Smith apples add a nice tart contrast, while Honeycrisp or Fuji bring sweetness and crunch. A blend ensures a balanced flavor that will keep your dessert from becoming overly mushy. For more tips on picking apples, check out this apple variety guide.
Achieving the Perfect Oat Topping Crunch
To get that crunchy oat topping you dream of, make sure to use quick-cooking oats. They create the right texture and help bind ingredients together. Mixing melted butter into the topping ensures even moisture throughout. For an extra flavor kick, consider adding a pinch of nutmeg or even some chopped nuts to the topping. A few extra minutes in the oven can also enhance that golden-brown finish. Enjoy your baking adventure!
Serving Suggestions for Apple Crisp
Best accompaniments for your apple crisp
When serving your apple crisp, consider pairing it with a few delightful options to elevate the experience. A classic choice is a generous scoop of creamy vanilla ice cream, which melts beautifully over the warm topping. For something a bit different, try a dollop of freshly whipped cream or a drizzle of caramel sauce. A sprinkle of chopped nuts, like pecans or walnuts, adds a tasty crunch.
Creative serving ideas
For a fun twist, serve your apple crisp in individual ramekins for personal portions. You could even layer it with yogurt for a breakfast treat! To impress guests, dust a little powdered sugar on top before serving, and don’t shy away from a side of spiced apple cider or herbal tea as the perfect beverage pairing. For more inspiration, check out this article on how to serve desserts.
Time Breakdown for Apple Crisp
Preparation Time
Getting everything together for your Apple Crisp takes about 30 minutes. This includes peeling and slicing the apples, measuring out your ingredients, and setting the stage for that delightful bake.
Cooking Time
Once your masterpiece is in the oven, you can kick back for 45 minutes while it bakes to golden perfection. Just wait for that wonderful aroma to fill your kitchen!
Total Time
In just 1 hour and 15 minutes, you're ready to serve a delicious, warm Apple Crisp that’s perfectly complemented by a scoop of vanilla ice cream. It’s the ultimate comfort dessert!
If you're interested in more baking tips or want to explore variations of this classic dish, check out Food Network’s baking guide for inspiration!
Nutritional Facts for Apple Crisp
When indulging in a warm serving of apple crisp, it's good to know what's in it. Here’s a quick look at the nutritional breakdown:
Calories
Each serving of this delicious apple crisp contains approximately 316 calories, making it a satisfying dessert without being overly indulgent.
Sugars
With around 44 grams of total sugars, this treat strikes a delightful balance of sweetness, enhancing the natural flavors of fresh apples while keeping your cravings in check.
Dietary Fiber
This recipe packs about 3 grams of dietary fiber per serving, helping to promote a feeling of fullness and aiding in digestion. Perfect for a wholesome yet comforting dessert!
For more detailed information on healthy eating and recipe adjustments, check out resources like the USDA's MyPlate or Harvard Health.
Enjoy each bite of your apple crisp knowing it's both delightful and nutrition-friendly!
FAQs about Apple Crisp
Can I use different fruits in apple crisp?
Absolutely! While apples are the classic choice for apple crisp, feel free to get creative. Pears, berries, or even peaches can add a delightful twist. Combining different fruits can elevate the flavor and texture, giving your crisp a unique touch.
What are the best apples for making crisp?
For the best apple crisp, opt for a mix of sweet and tart apples. Granny Smith apples add a pleasant tartness, while Fuji or Honeycrisp apples offer sweetness and crunch. Using a blend of these varieties will give you a well-rounded flavor profile.
How do I store leftovers of apple crisp?
To store leftover apple crisp, let it cool completely, then cover it tightly with plastic wrap or aluminum foil. It can stay in the refrigerator for up to 4 days. If you want to enjoy it later, consider freezing portions. Just make sure to use an airtight container and consume it within three months for the best flavor.
For more tips on apple varieties, check out The Apple Tree for expert advice!
Conclusion on Apple Crisp
In conclusion, Apple Crisp is a timeless dessert that never fails to impress. The harmony of sweet, tender apples topped with a crunchy oat mixture creates a delightful contrast in textures. Serve it warm, perhaps with a scoop of vanilla ice cream, for an exquisite treat anyone can enjoy.
Apple Crisp
Equipment
- 9x13-inch baking dish
- large bowl
- fork
Ingredients
- 10 cups all-purpose apples peeled, cored and sliced
- 1 cup white sugar
- 1 tablespoon all-purpose flour
- 1 teaspoon ground cinnamon
- 3 tablespoons water
- 1 cup quick-cooking oats
- 1 cup all-purpose flour
- 1 cup packed brown sugar
- ¼ teaspoon baking powder
- ¼ teaspoon baking soda
- ½ cup butter melted
Instructions
- Gather all ingredients. Preheat the oven to 350 degrees F (175 degrees C).
- Place sliced apples in a 9x13-inch baking dish. Mix white sugar, 1 tablespoon flour, and cinnamon together; sprinkle over apples. Pour water evenly over apples.
- Combine oats, 1 cup flour, brown sugar, baking powder, and baking soda in a large bowl. Add melted butter and mix with a fork until crumbly; sprinkle evenly over apple mixture.
- Bake in the preheated oven until apple filling is bubbling, and top is golden brown, crisp, and caramelized around the edges, about 45 minutes.
- Enjoy!


Leave a Reply