
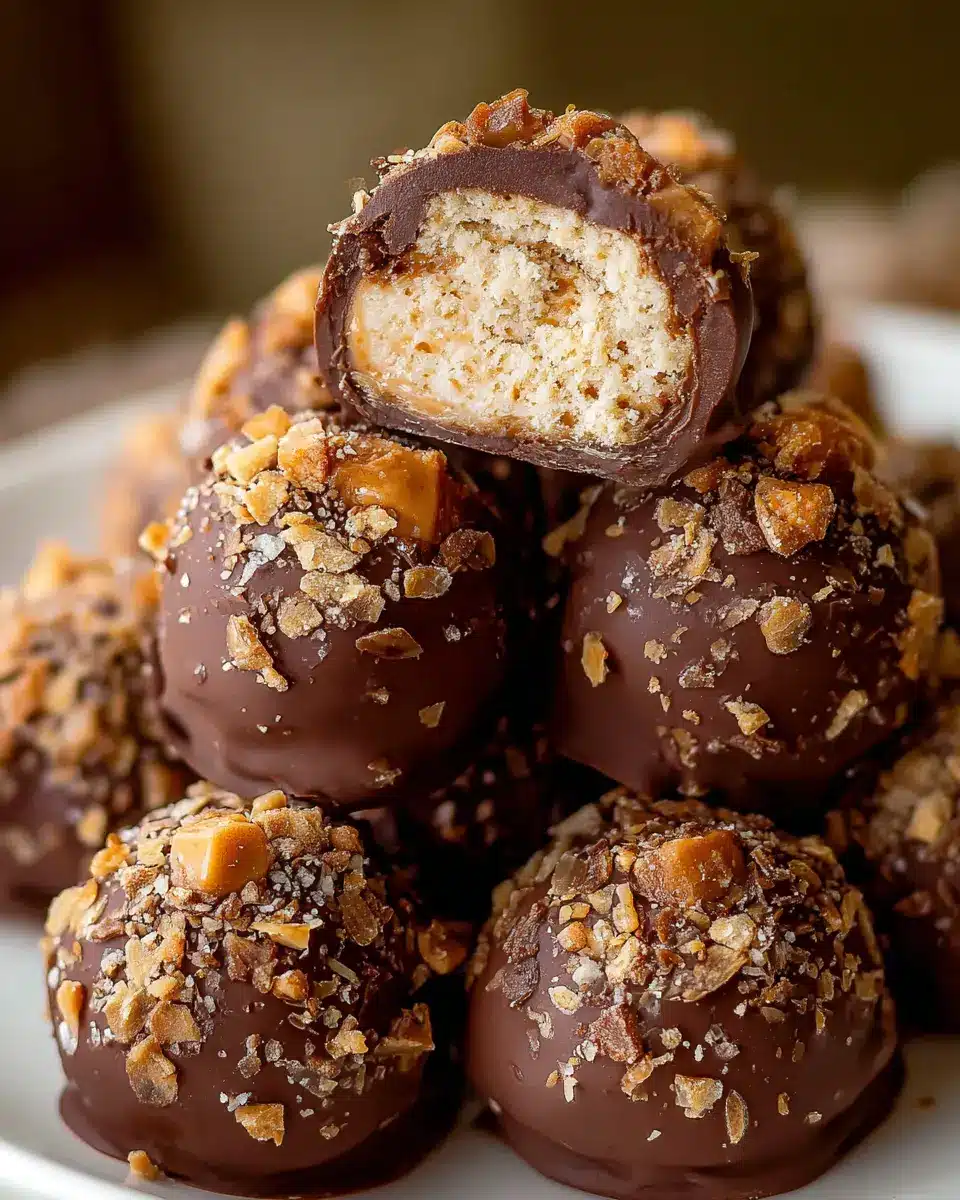
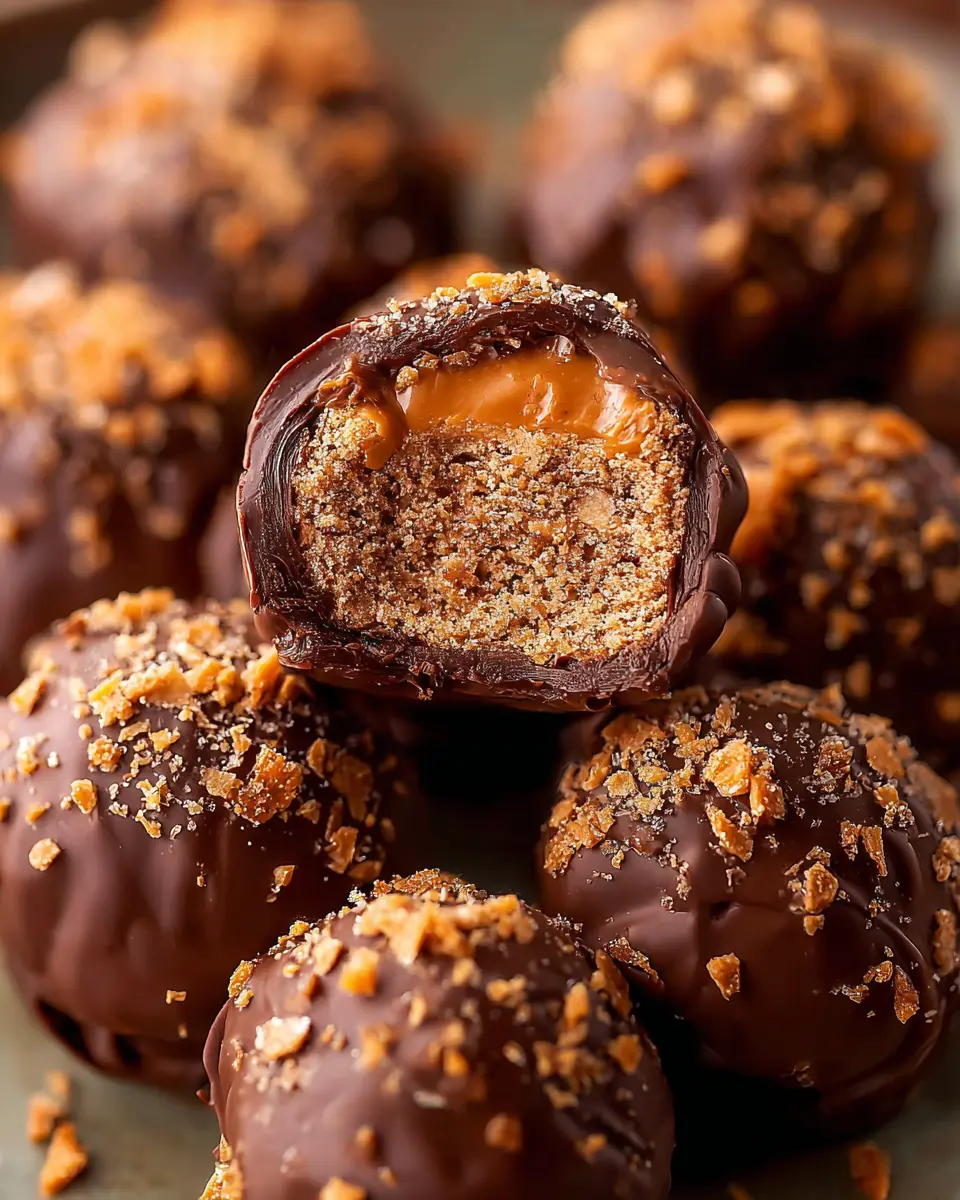
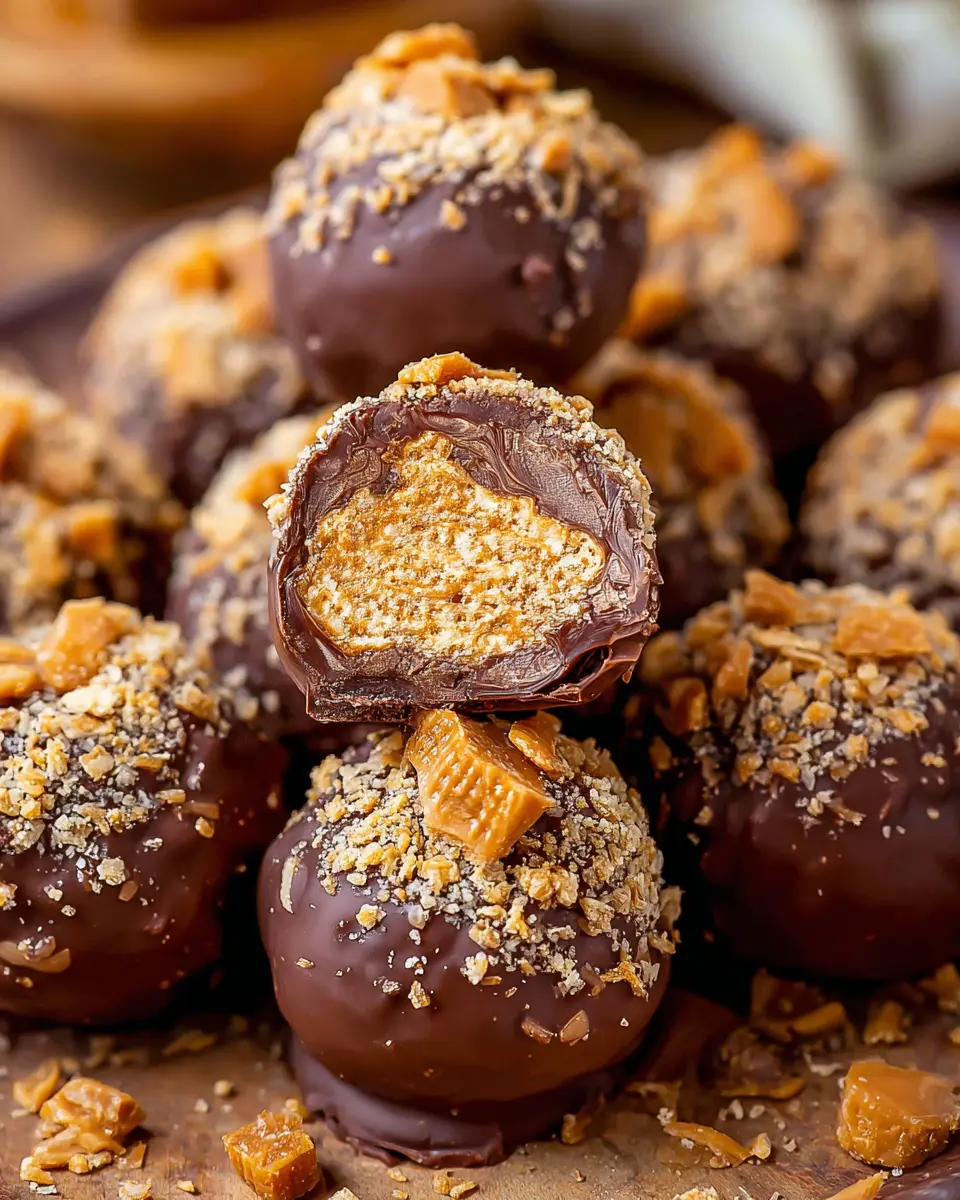
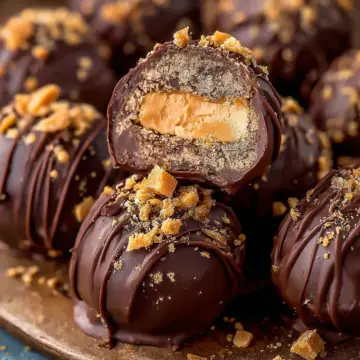
Introduction to Butterfinger Balls
If you’re on the lookout for a delightful dessert that strikes the perfect balance between sweet and salty, Butterfinger Balls are your answer! These treats are incredibly easy to make and are sure to impress your friends and family. Imagine biting into a smooth, creamy peanut butter filling that’s then coated in rich chocolate and finished off with crispy Butterfinger bits. They not only taste fantastic, but they also look incredible on a dessert platter.
Why Butterfinger Balls make a perfect treat?
- Quick and Simple: With just five ingredients, you can whip up these Butterfinger Balls in only 30 minutes. They're a fantastic option for spontaneous gatherings or late-night cravings.
- Versatile and Fun: Perfect for any occasion, from birthday parties to holiday celebrations, these treats can easily be customized with different toppings or chocolate coatings. Get creative!
- A Crowd-Pleaser: Who doesn’t love the combination of peanut butter and chocolate? These Butterfinger Balls are universally appealing, making them ideal for dessert tables or as a gift.
So why not give this delicious treat a try? Your taste buds will thank you, and you may just find yourself making them again and again! For more sweet inspirations, check out resources like Serious Eats and Food Network for expert tips and tricks.
Ingredients for Butterfinger Balls
Creating Butterfinger Balls is not only fun but also incredibly simple with just five key ingredients! Each component plays a crucial role in delivering that amazing flavor and delightful texture. Let’s dive into what you’ll need:
-
Creamy Peanut Butter: 1⅓ cups of creamy peanut butter forms the heart of your filling. Choose a high-quality brand like Jif for the best results.
-
Salted Butter: ½ cup of softened salted butter adds richness and a creamy consistency that melds beautifully with the peanut butter.
-
Vanilla Extract: Just a teaspoon of vanilla extract enhances the overall flavor profile, making the balls irresistible.
-
Powdered Sugar: You’ll need 2 cups of powdered sugar to give these tasty treats their sweetness and delightful texture.
-
Butterfinger Bits: 1½ cups of Butterfinger Bits provide that signature crunchy texture, with extra for topping if you like.
-
Chocolate Melting Wafers: Lastly, 3 cups of chocolate melting wafers are essential for that creamy chocolate coating. You can find these at most grocery stores or online.
Gather these ingredients, and you’ll be on your way to whipping up some delicious Butterfinger Balls in no time!
Preparing Butterfinger Balls
Making Butterfinger Balls is a fun and rewarding project that results in delicious treats everyone will adore. Let's walk through the steps together and ensure you're all set to create these sweet delights in no time!
Gather Your Ingredients
Start by getting your ingredients ready. A little prep work goes a long way! For this recipe, you'll need:
- 1⅓ cup creamy peanut butter
- ½ cup salted butter, softened
- 1 teaspoon vanilla extract
- 2 cups powdered sugar
- 1½ cups Butterfinger Bits (plus extra for decorating)
- 3 cups chocolate melting wafers
Check out this link for the perfect creamy peanut butter. Having everything at your fingertips will streamline your cooking process.
Cream the Peanut Butter Mixture
In a large bowl or using a stand mixer, combine the peanut butter, softened butter, and vanilla. Cream them together for about 30 seconds until the mixture is smooth and well-combined. This step is crucial as it gives your Butterfinger Balls that rich, creamy texture.
Incorporate the Powdered Sugar
Next, sift in the powdered sugar gradually. Mixing it in carefully ensures a lump-free, delectable filling. Beat until the mixture is smooth, which should take just a minute or two. If you’ve ever struggled with lumpy frosting, this tip will save you time and frustration!
Mix in the Butterfinger Bits
Once the sugar is fully incorporated, add in those irresistible Butterfinger Bits. Gently fold them in until well-distributed throughout the mixture. These bits will give your Butterfinger Balls that signature flavor and delightful crunch.
Chill and Shape the Mixture
After mixing, it’s time to chill the dough. Pop it in the refrigerator for about 30 minutes. This step helps with shaping later on. Once chilled, use a medium cookie scoop to portion out the mixture and roll each scoop into a ball. Place them on a lined cookie sheet and pop them in the freezer for 20 to 30 minutes. Chilling is essential to maintain shape during the dipping process.
Melt the Chocolate
Before you remove the balls from the freezer, melt your chocolate melting wafers. A wide glass works great for this—just heat in 30-second intervals, stirring in between until completely melted. The right consistency will ensure an even dip for your Butterfinger Balls.
Dip and Decorate the Balls
Now comes the fun part! Using a fork or dipping tool, dip each chilled ball into the melted chocolate, ensuring it's generously coated. Once dipped, place them back on the parchment paper and sprinkle with extra Butterfinger Bits before the chocolate sets. Allow them to harden completely.
And there you have it! Your homemade Butterfinger Balls are ready to be enjoyed. They can be stored in an airtight container in the fridge for up to a week, or frozen for a sweeter snack later on. Enjoy this delicious treat at your next gathering, or simply treat yourself—you deserve it!
Variations on Butterfinger Balls
Alternative chocolate coatings
While milk chocolate is a classic choice for Butterfinger Balls, don't hesitate to experiment! Dark chocolate offers a rich, bittersweet contrast that’s lovely. For an extra twist, try white chocolate for a creamier flavor. You could even add a sprinkle of sea salt on top for a delightful sweet-salty combo. Chocolate bark or flavored melts, like caramel or mocha, can take your treats to the next level. If you're looking for something non-dairy, consider vegan chocolate options that melt just as well.
Different mix-ins for added flavor
To keep your Butterfinger Balls exciting, think about adding diverse mix-ins. Chopped nuts like almonds or pecans add crunch and depth of flavor. You might also toss in a few mini marshmallows for that chewy surprise. For a hint of spice, a dash of cinnamon or pumpkin spice can give your creations a unique flair. Remember to balance the mix-ins so that they complement rather than overwhelm the filling. With these ideas, you can customize your Butterfinger Balls to suit any palate!
Baking notes for Butterfinger Balls
Tips for a smooth dip
To achieve a flawless chocolate coating for your Butterfinger Balls, make sure your chocolate is melted to a smooth, glossy consistency. If you're using chocolate chips, consider stirring in a bit of coconut oil (about ½ teaspoon per cup) for added liquidity. When dipping, avoid letting the balls sit out for too long — this can cause them to sweat, making it difficult for the chocolate to stick. A quick chill before dipping helps maintain their form.
How to store your treats
Once your Butterfinger Balls are beautifully coated, store them in an airtight container in the refrigerator for up to 7 days. Alternatively, if you're looking to extend their deliciousness, freeze them in a freezer bag for up to 3 months. Just remember to let them thaw in the refrigerator rather than at room temperature for best results. Enjoy your sweet creations!
Serving suggestions for Butterfinger Balls
Pairing with drinks
Butterfinger Balls are an indulgent treat that pairs beautifully with refreshing beverages. Consider serving them alongside a chilled glass of milk for a classic combo that evokes nostalgia. For a more sophisticated touch, a hot cup of coffee or espresso enhances their rich flavors, creating a delightful contrast. If you're hosting a gathering, offer a selection of sparkling waters—perhaps with a splash of fruit juice—to keep your guests refreshed while they enjoy these sweet bites.
Creative presentation ideas
To elevate your Butterfinger Balls, try arranging them on a decorative platter or in cupcake liners for a fun, festive touch. Adding a sprinkle of extra Butterfinger Bits on top adds a pop of color and texture. You might also create themed platters for special occasions—think holiday-themed decorations or seasonal colors. Wrapping individual balls in clear treat bags tied with colorful ribbons makes for a charming gift or party favor that is sure to impress!
Tips for making perfect Butterfinger Balls
Choosing the right chocolate
When it comes to coating your Butterfinger Balls, selecting the right chocolate is crucial. Chocolate melting wafers are perfect because they melt smoothly and coat evenly. If you prefer chocolate chips, consider adding about ½ teaspoon of coconut oil per cup for a glossy, easy-to-dip finish. This not only enhances the chocolate's texture but also helps it adhere better to your Butterfinger Balls.
Preventing chocolate from sweating
A common challenge when making Butterfinger Balls is preventing the chocolate from sweating. To avoid this, make sure you don’t leave the balls out too long before dipping. If they warm up, they can start to sweat, making it difficult for the chocolate coating to stick perfectly. Keep them chilled until you’re ready to dip to ensure a smoother coating process!
For more chocolate tips, you can check out Serious Eats for expert advice!
Time Details for Butterfinger Balls
Preparation Time
Getting started on your Butterfinger Balls is a breeze! You’ll need about 30 minutes to mix together this delightful treat.
Chill Time
After mixing, it’s important to let the mixture chill for 1 hour in the refrigerator. This helps the flavors meld beautifully and makes rolling the balls easier.
Total Time
In total, plan for 1 hour 30 minutes from start to finish, including chilling and preparation. Once you taste these sweet bites, you'll know that every minute was well worth it!
For more information on making perfect treats, check out this blog packed with dessert inspiration!
Nutritional Information for Butterfinger Balls
When satisfying your sweet tooth with Butterfinger Balls, it’s essential to know what’s in each delectable bite. Here's a breakdown of their nutritional content:
Calories
Each Butterfinger Ball packs approximately 210 calories, making them a rich treat perfect for occasional indulgence.
Protein
These delightful morsels deliver about 3 grams of protein per ball, thanks mainly to the creamy peanut butter base. It's a tasty way to get a little protein into your dessert!
Sugar
With around 21 grams of sugar, these treats are definitely on the sweeter side. Pair them with a cup of coffee or tea for a balanced end to your day.
For more information on maintaining a balanced diet while enjoying your favorite treats, check out resources from the American Heart Association and ChooseMyPlate.gov. Enjoy your Butterfinger Balls guilt-free, and don’t forget to share them with friends and family!
FAQs about Butterfinger Balls
Can I use natural peanut butter?
While you can technically use natural peanut butter, I recommend sticking to a creamy brand like Jif for this recipe. Natural peanut butter often has a different consistency, which could affect the texture of your Butterfinger Balls. If you do decide to use it, make sure to stir it well before measuring to achieve a smooth mixture!
How long do Butterfinger Balls last?
These delectable treats can stay fresh in an airtight container in the refrigerator for up to seven days. If you’re looking to savor them longer, consider freezing. Properly stored, they can last in the freezer for up to three months.
Can I freeze Butterfinger Balls?
Absolutely! Freezing Butterfinger Balls is a fantastic way to enjoy them later. Just place them in a freezer bag, making sure to remove any excess air. When you’re ready to enjoy a sweet treat, simply allow them to thaw in the fridge or at room temperature. For more info, you can check out these freezing tips for treats!
Conclusion on Butterfinger Balls
In summary, Butterfinger Balls are an incredibly easy and delightful treat that everyone will love. With just five ingredients and a total prep and chill time of 90 minutes, they're perfect for any occasion. Feel free to experiment with toppings and share them with friends for double the fun!
Butterfinger Balls
Equipment
- Stand Mixer
- cookie sheet
- parchment paper
- fork or dipping tool
- mixing bowl
Ingredients
Filling
- 1 ⅓ cup creamy peanut butter Jif creamy peanut butter recommended
- ½ cup salted butter softened
- 1 teaspoon vanilla extract
- 2 cups powdered sugar
- 1 ½ cups Butterfinger Bits plus more for topping (optional)
Coating
- 3 cups chocolate melting wafers
Instructions
Preparation
- Add the peanut butter, butter, and vanilla to a large bowl or stand mixer and cream together for 30 seconds.
- Sift the powdered sugar into the bowl and beat until smooth.
- Mix in the butterfinger bits until incorporated.
- Chill the mixture in the refrigerator for 30 minutes.
- Line a cookie sheet with parchment paper and portion the peanut butter mixture out with a medium cookie scoop and roll into balls. Place them on the cookie sheet and chill in the freezer for 20 to 30 minutes.
- Just before removing the balls from the freezer, melt the chocolate melting wafers in a wide glass on 30-second intervals, stirring between each, until fully melted.
- Use a fork or dipping tool to dip them in the melted chocolate then place them back on the parchment paper.
- Sprinkle the tops of the balls with Butterfinger Bits and allow them to set until the chocolate hardens.

Leave a Reply